

how to create nft on rarible
How to make and sell an NFT

How to make and sell an NFT is a question on many artists' minds at the moment. The digital tokens have made big headlines, and generated quite some controversy, due to the eyewatering prices that some NFT art has fetched, so it's understandable that many are wondering if NFTs offer a chance to make some money from their own creative work. If that's you, this article will help explain the whole process of how to sell an NFT.
First off, though, let's just take a reality check. Yes, it's true that some NFT art has sold for thousands – and even millions – of dollars. Beeple's Crossroad (pictured above) resold for $6.6m on the secondary market in February 2021, and you can find more such examples in our selection of the best NFT artwork. But these are rare exceptions. Moreover, even if you do replicate that success, you're likely to find that most of the money won't come to you.
The crypto companies that enable the transactions and the platforms that generate and maintain NFTs charge a whole range of fees to NFT artists, both upfront and after the sale, and they can even leave you out of pocket. To learn more before you delve in, make sure you see our explainer on what are NFTs.
How to make and sell an NFT
If you are prepared to take the risk, read on to learn the practical steps involved in the process of navigating an NFT platform. For illustrative purposes, we'll demonstrate this using the NFT platform Rarible and the cryptocurrency payment platform MetaMask. This is in no way an endorsement of either, and there are many other providers to consider.
Other NFT platforms include OpenSea, SuperRare, Nifty Gateway, Foundation, VIV3, BakerySwap, Axie Marketplace and NFT ShowRoom. Other payment platforms include Torus, Portis, WalletConnect, Coinbase, MyEtherWallet and Fortmatic.
01. Buy some cryptocurrency

The first thing to understand is that you'll need to pay a platform to 'mint' (i.e., generate) an NFT of your work. Most platforms want paying in Ether, the native cryptocurrency of the open-source blockchain platform Ethereum, which is where NFTs first launched.
Like bitcoin and many other cryptocurrencies, the value of Ether (abbreviated as ETH) can fluctuate wildly. Over 2021, the price of 1 ETH has gone from under $1,000 to over $4,000, but with many peaks and troughs in between, and it's been known to swing by several hundreds of US dollars in a matter of hours.
To buy Ethereum, you need to create what's called a 'digital wallet' and connect that to your NFT platform of choice. There are many digital wallet services, but for illustrative purposes, we'll use MetaMask, which is available as a browser extension and as a mobile app. If you'd rather use another service or if you're already familiar with digital wallets, skip stright to step 4.
02. Create a digital wallet
To create a digital wallet with MetaMask, you'll need to its website and click on the blue 'Download' button in the top-right. As we're using a desktop computer, we choose the option to install the browser extension, but there's also a mobile app.
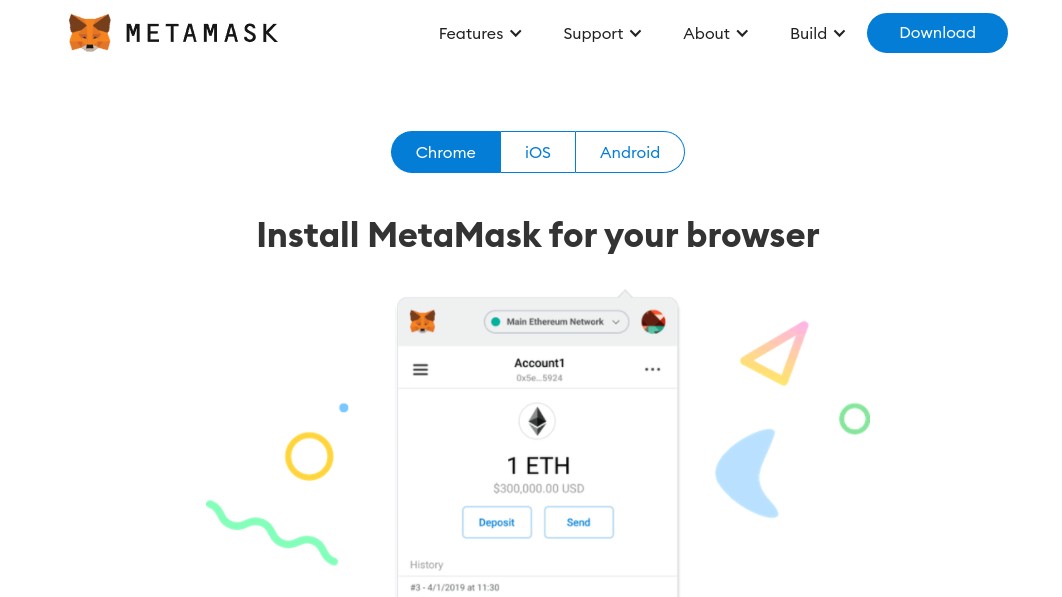
You'll be asked to confirm that you wish to 'create a new wallet and seed phrase'. Don't worry too much about what 'seed phrase' means (it's basically a list of words that stores blockchain information). Say yes, then it's simply a matter of agreeing to the terms, creating a password, and ploughing through some security measures, then you'll have your account set up.
03. Add money to your wallet
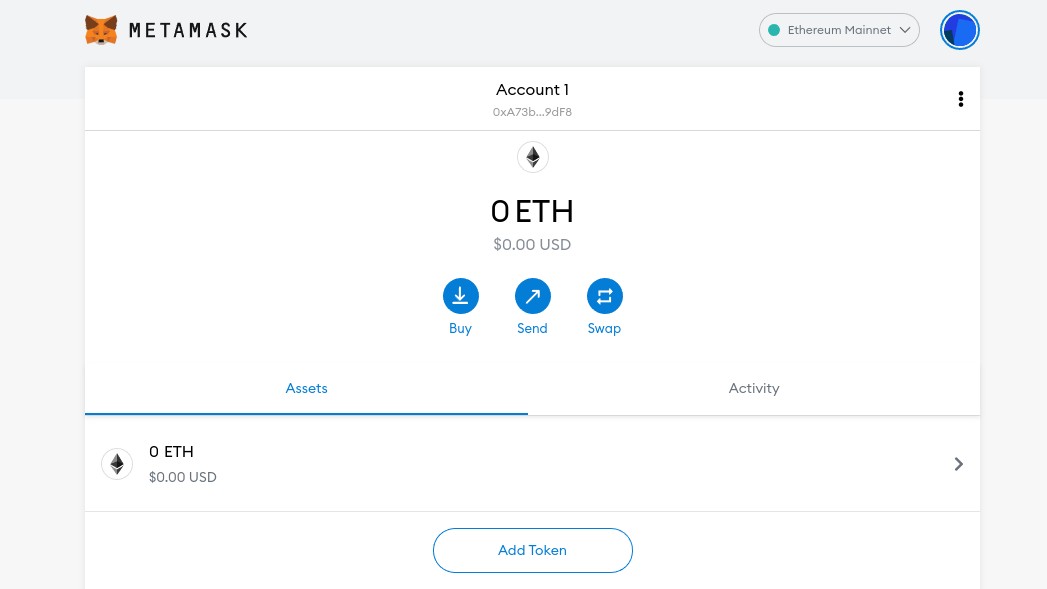
Once you have your MetaMask wallet, or any digital wallet, you'll need to add some ETH to it. It's fairly easy to do so: just click on the 'Buy' button and select the option 'Buy ETH with Wyre'. You'll be taken to a screen where you can buy ETH with either Apple Pay or a debit card. Note that if you'd prefer not to part with any money yet, you can leave this stage until later; it just requires a little more faff.)
04. Connect your wallet to an NFT platform
Most digital wallets work in a similar way. Whichever one you've chosen, once you have some ETH deposited in your wallet and ready to spend, you can head to the NFT platform that you'll use to create your NFT. Again, for illustrative purposes, we're using Rarible, but there are many other NFT platforms to choose from.
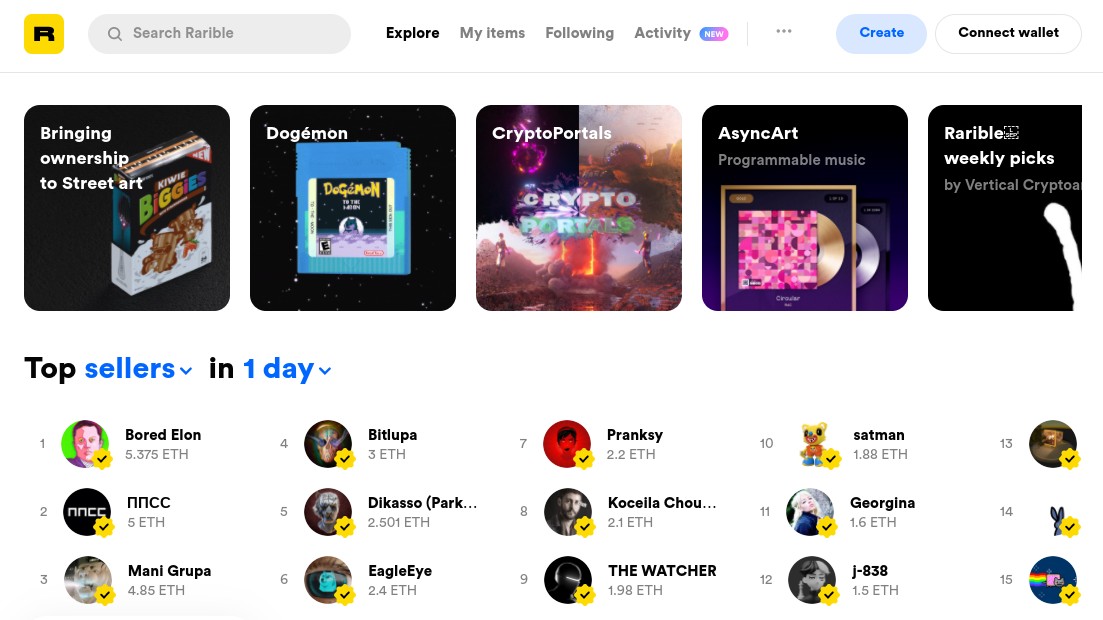
Go to Rarible.com (shown above). In the right-hand corner of the screen, there's a button that reads 'Connect wallet'. Click that, and on the next screen, you'll be asked for your wallet provider, which is our case is MetaMask. A popup will give you the option to connect your wallet with Rarible. Click on 'Next', then 'Connect', accept the terms of service and confirm you're over 13 years old.
05. Upload your file
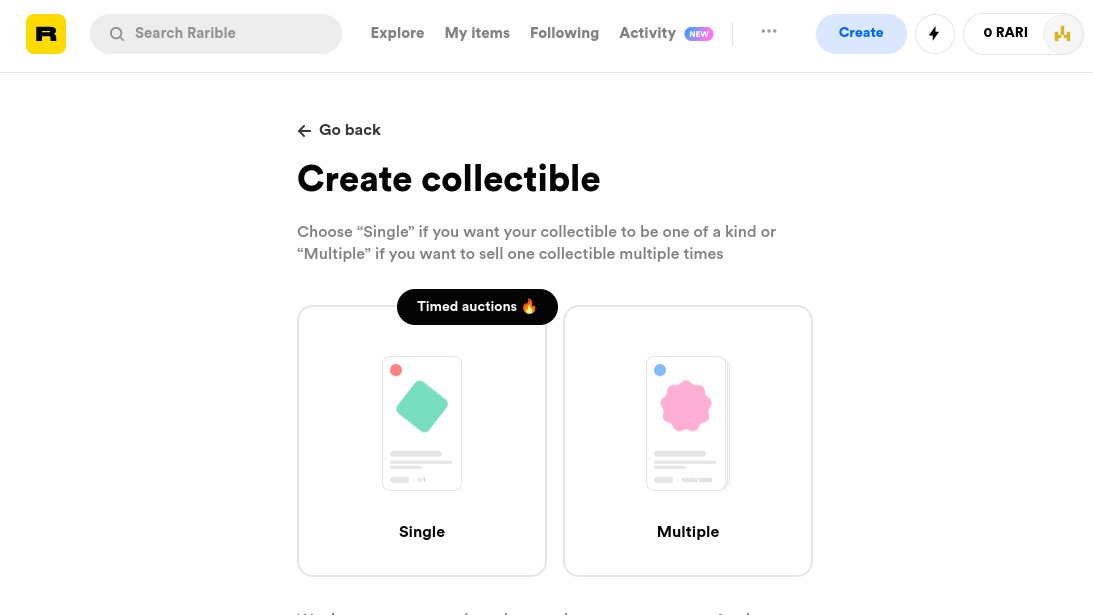
Hoorah! You're now ready to create your NFT. Click the blue 'Create' button at the top right, and you'll see options to create a single, one-off work, or sell the same item multiple times. In this example, we'll opt for 'Single'. Now you need to upload the digital file that you want to make into an NFT. Rarible takes PNG, GIF, WEBP, MP4 and MP3 files, up to 30MB in size.
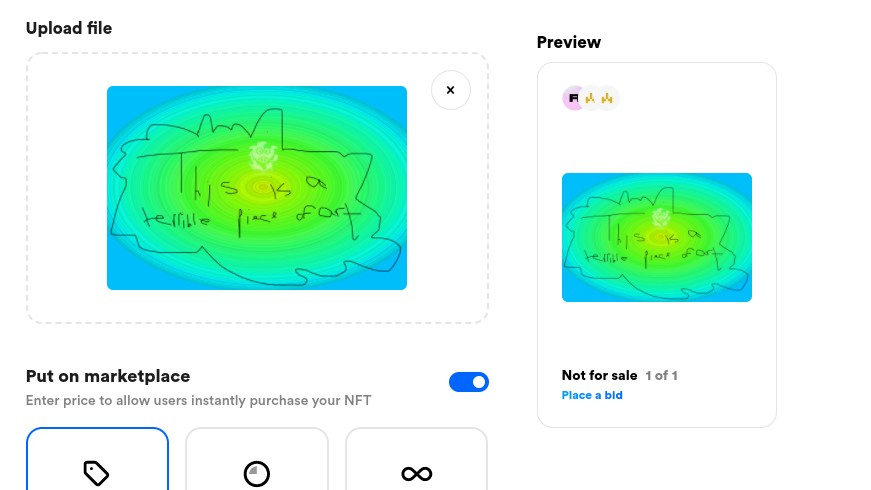
To illustrate, we've created an ironically awful piece of art, inspired by David Hockney's recent controversial work. Upload your (hopefully much better) digital file, and on the right, you'll see a preview of what your NFT post will look like.
07. Set up an auction
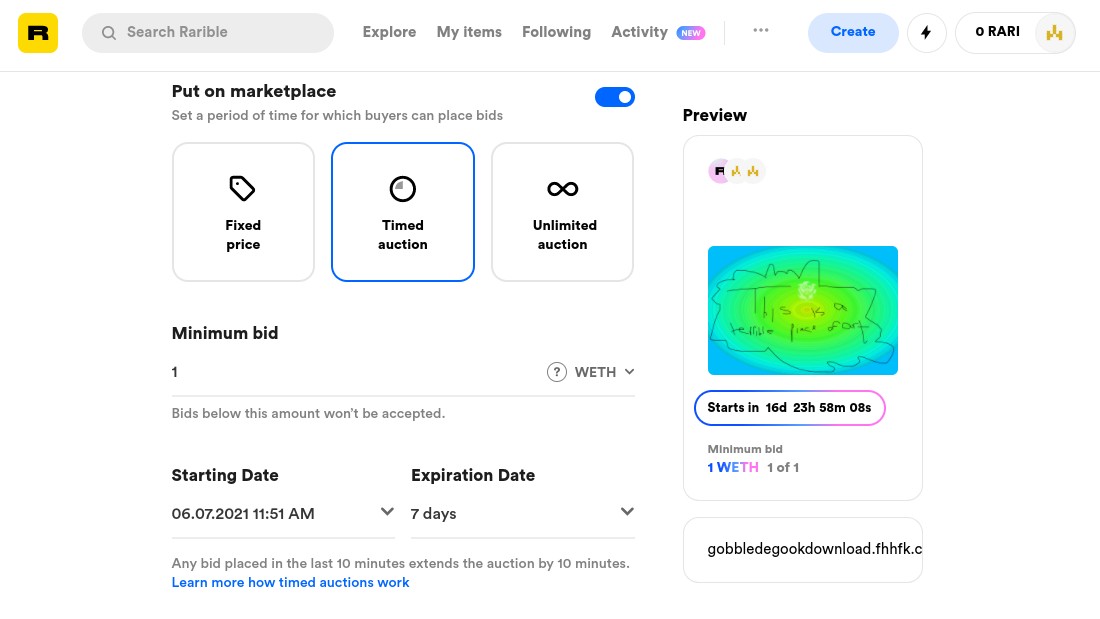
In the next part of the form, you'll need to choose how you want to sell your NFT artwork. There are three options. 'Fixed price' lets you set a price and sell to someone instantly (like 'Buy it now' on eBay). 'Unlimited Auction' will allow people to carry on making bids until you accept one. Finally, 'Timed auction' is an auction that only takes place for a certain time. That's the option we'll choose for our example.
Now we get to the tricky part: setting a minimum price. Set it too low, and the enormous fees will swallow up your profit and could even leave you losing money. We'll set our price at an ambitious 1 ETH and give people seven days to make bids.
Next, you get an option to 'Unlock once purchased'. This gives you the chance to provide your eventual buyer with a full, high resolution version of your art, and/or additional material through a secret web page or download link. Below is the most confusing option, titled 'Choose Collection'. This is a very technical question about how the blockchain is set up. The default option here is 'Rarible', and we'd advise leaving it like that.
08. Describe your NFT
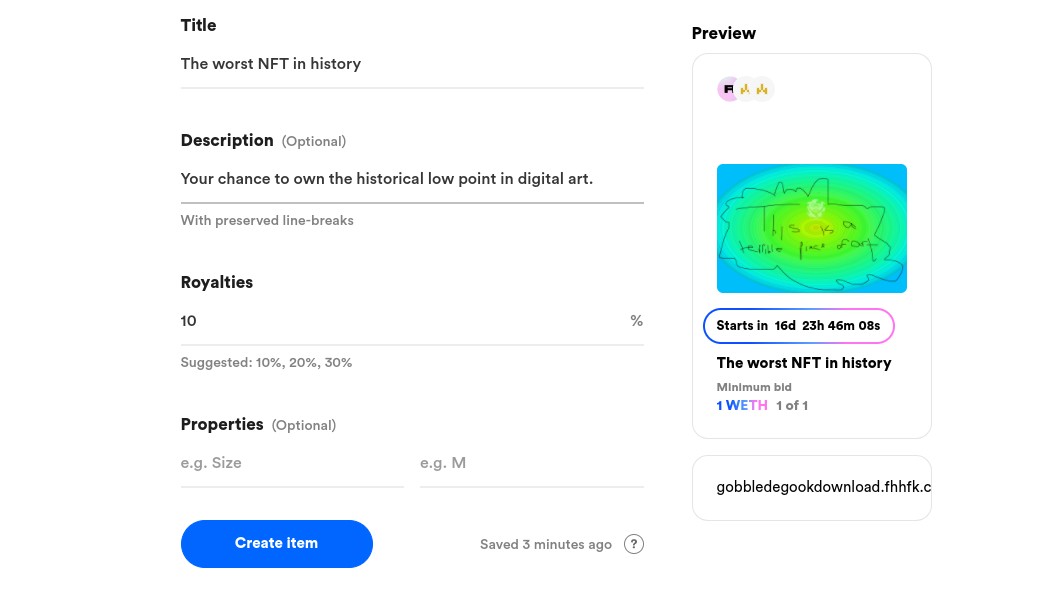
Next, you can add a title and description for your listing. To maximise your chances of selling your NFT, you'll need to spend some time thinking about this. You're then asked to consider what percentage of royalties you wish to claim on any resale of your art in the future.
Again, this is a balancing act, as a higher percentage will net you more money per sale, but it will also deter people from reselling your art in the first place as they'll be less likely to make a profit for themselves. Finally, there's an optional field to add your file's properties. With that complete, you're almost done.
09. Pay the fee (but be warned)
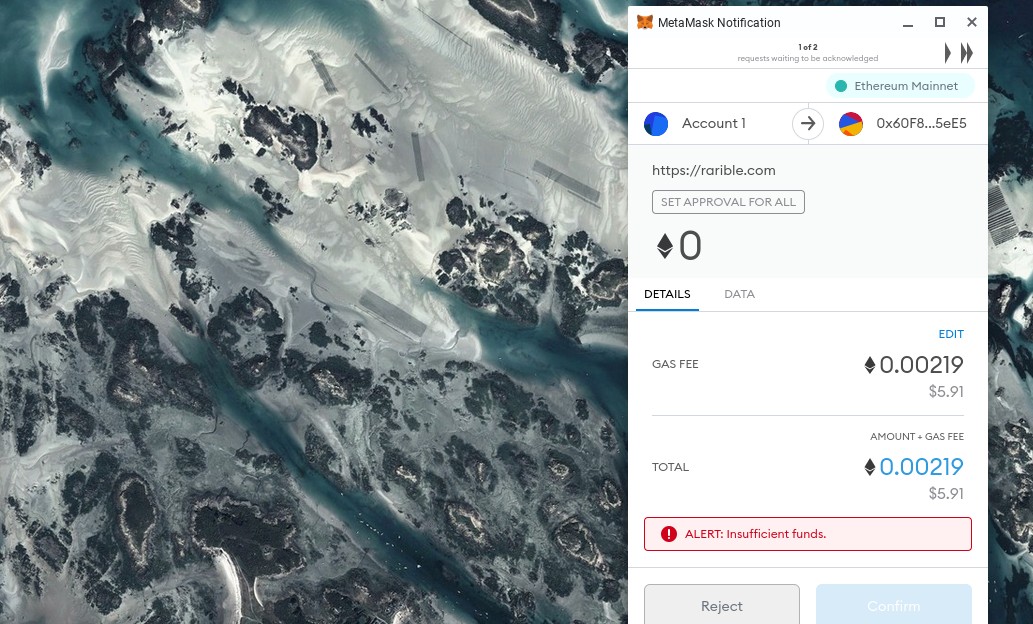
Click 'Create Item', and you'll be invited to connect with your wallet to pay the listing fee. If you don't have sufficient funds in your wallet, don't worry: you won't have to start again. Just click on the wallet icon in the top-right corner of the screen, and you'll be given the option to add funds directly within Rarible.
Before you do so, be warned. The listing fee may seem low: in our case it was just $5.91. But this is only the beginning of the fees you'll be charged. Before you can go any further, you have to agree to a further fee to actually generate your NFT, which in our case would have been $42.99. If someone actually buys your NFT, there'll also be a commission fee on the sale, and a transaction fee for transferring the money from the buyer's wallet to your own. From our point of view, none of this seemed very clear on Rarible's website at the time we tried it.
We'd love to be able to explain, clearly and simply, how to calculate the cost of creating and selling an NFT, but the confusing nature of blockchain technology, the wild fluctuations in cryptocurrency values and the lack of transparency on the platforms themselves make that an impossible task. So really, you have to have to wait and see how much you get charged overall if you make a sale.
If you do fancy taking a punt and throwing a bit of money at NFTs, though, we wish you the best of luck. We'd love to hear about how you got on via Twitter at @creativebloq or Instagram at @creativebloqofficial.
Read more:
- 22 incredible drawing apps for iPad
- The best digital art software for creatives in
- 6 ways to improve your digital art skills

Tom May is a freelance writer and editor specialising in design, photography and tech. He is author of Great TED Talks: Creativity, published by Pavilion Books. He has previously been editor of Professional Photography magazine, associate editor at Creative Bloq, and deputy editor at net magazine.
Related articles
how to create nft on rarible
Source: https://www.creativebloq.com/how-to/make-and-sell-an-NFT
Posted by: williamsalksomed.blogspot.com
0 Response to "how to create nft on rarible"
Post a Comment